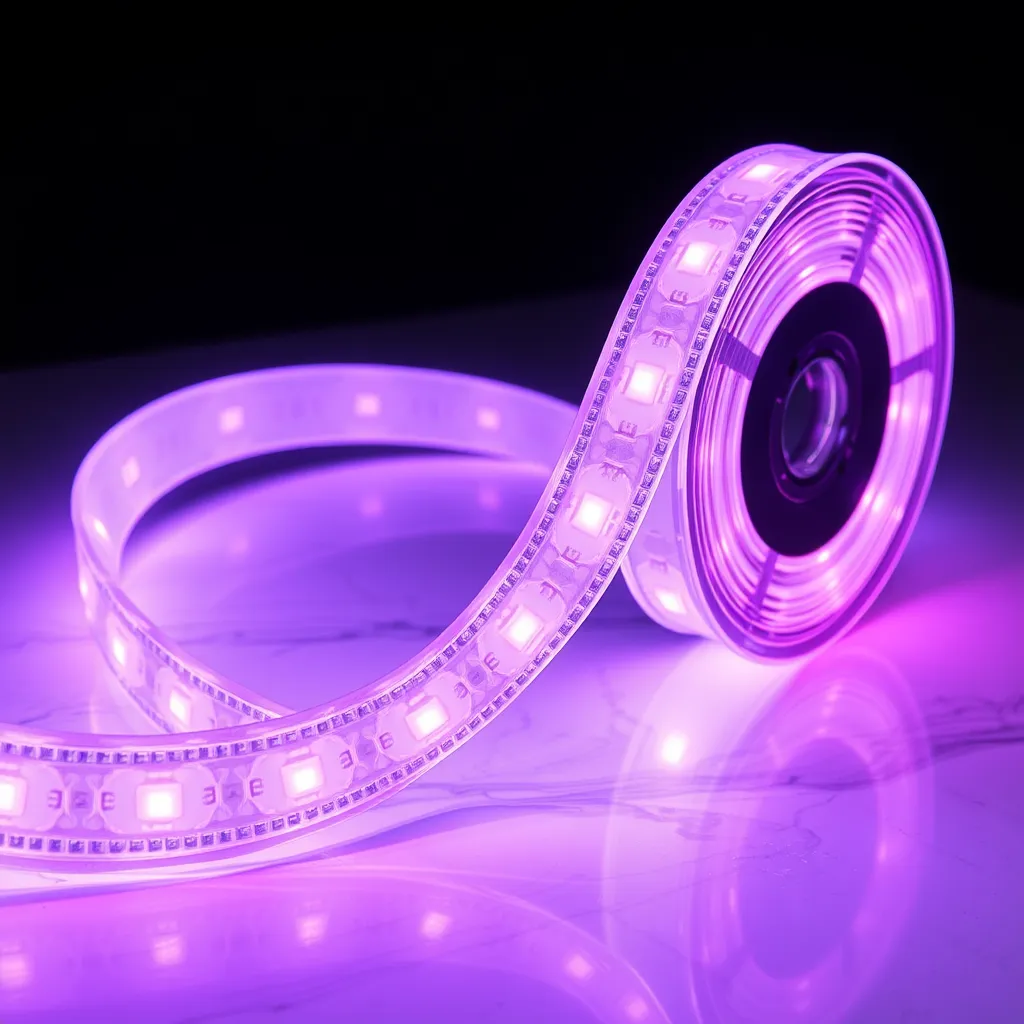
LED rope lights offer a distinct set of advantages over the more common flat LED strips. Encased in a thick, flexible PVC tube, these lights provide 360-degree protection for the internal circuitry, making them far more durable for high-traffic areas and outdoor environments. However, because they are heavier and more cylindrical than tape lights, hanging them requires specific hardware and techniques to ensure they stay in place without sagging or damaging the surface.
Successful installation relies on understanding the weight-to-tension ratio. A standard 1/2-inch diameter rope light weighs approximately 1.5 to 2 ounces per foot. On a 50-foot run, you are dealing with nearly 6 pounds of constant downward pull. Standard adhesive tapes often fail under this load, especially when heat from the LEDs softens the glue. To achieve a professional result, you must choose a mounting method that matches the surface material and the environmental conditions.
Comparing Mounting Hardware and Methods
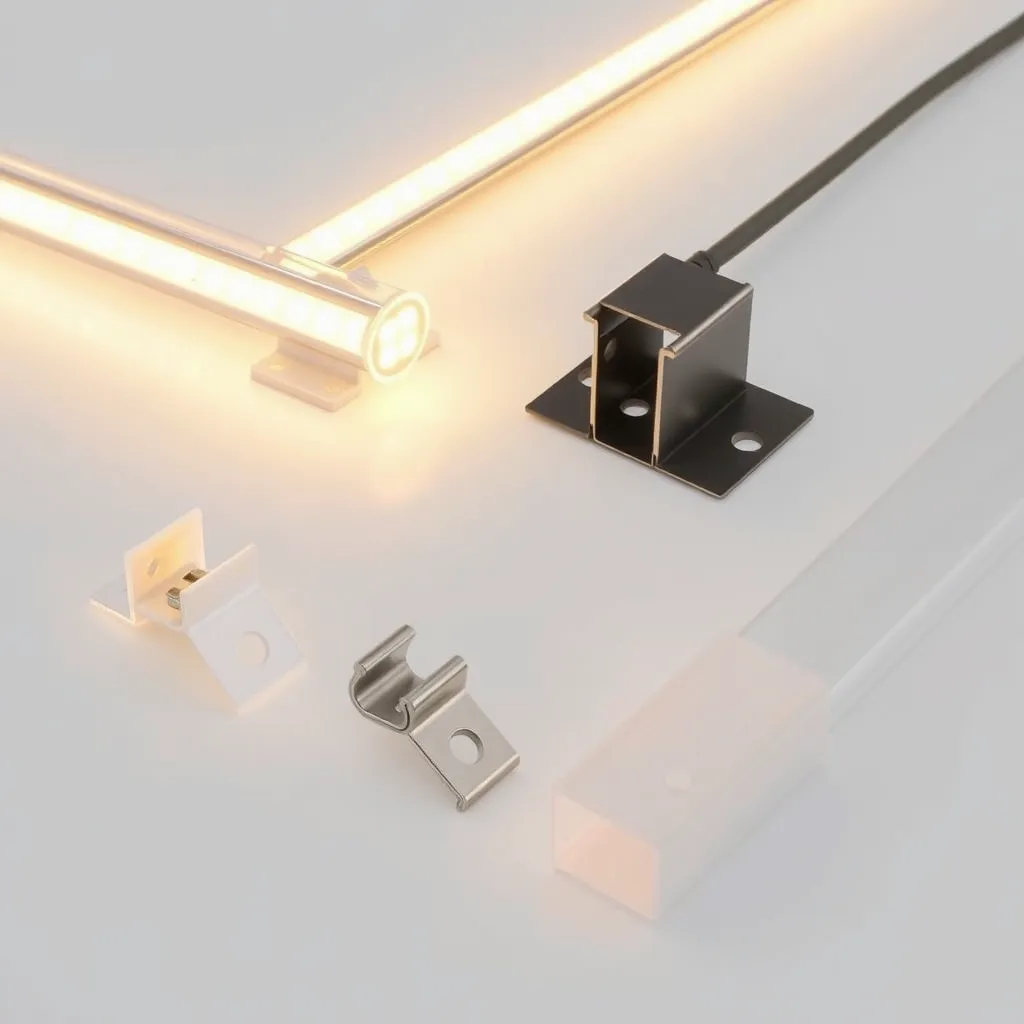
The choice of hardware determines the longevity of the installation. While many rope light kits include basic clips, these may not be suitable for every surface. For example, plastic clips can become brittle in extreme UV exposure, while adhesive hooks may peel paint off interior drywall if overloaded.
Mounting Method | Best Surface Applications | Spacing Requirement | Weight Capacity | Durability |
|---|---|---|---|---|
Screw-In P-Clips | Wood, Decks, Eaves, Masonry | 12 inches | High (Mechanical) | Permanent |
Adhesive Command Hooks | Finished Drywall, Tile, Glass | 8-10 inches | Moderate | Removable |
Aluminum Mounting Channels | Commercial, High-End Residential | Continuous | Very High | Permanent |
UV-Rated Cable Ties | Railings, Fences, Lattice | 12-18 inches | High | Weather-Resistant |
Gutter/Shingle Clips | Rooflines, Gutters | 18 inches | Moderate | Seasonal |
Essential Preparation and Layout Planning
Before mounting any hardware, test the entire spool of light. Plug it in for at least 15 minutes to check for "dead sections" or color inconsistencies. This also warms the PVC tubing, making it significantly more pliable and easier to straighten. Cold rope light retains its "spool memory," causing it to coil and resist being pressed into clips.
Measure the total distance and identify the nearest power source. If you are using 120V driverless rope lights, you can run lengths up to 150 feet on a single plug. However, low-voltage (12V or 24V) systems often require a transformer every 16 to 32 feet to prevent voltage drop, which results in the end of the run appearing dimmer than the start. Factor in the location of these power supplies so they remain accessible but hidden.
Clean the mounting surface thoroughly. For adhesive-based clips, use a 70% isopropyl alcohol solution to remove dust and oils. Even a microscopic layer of dust can reduce adhesive bond strength by 50%. If mounting on wood or masonry, ensure the surface is dry and free of loose debris before drilling pilot holes for clips.
Indoor Installation: Coves, Valances, and Baseboards
Indoor applications usually focus on indirect lighting. The goal is to see the glow, not the light source itself. When installing in a ceiling cove, place the rope light approximately 2 inches back from the edge of the molding. This allows the light to spread evenly across the ceiling without creating "hot spots" or visible reflections of the individual LED diodes.
Ceiling and Wall Perimeter Steps
Mark the Line: Use a laser level or a chalk line to create a perfectly straight reference. Even a 1/2-inch deviation becomes obvious once the light is turned on.
Install Hardware: Space your clips every 12 inches. If the run includes a corner, place a clip 2 inches before the corner and 2 inches after it. This supports the curve and prevents the rope from pulling away from the wall.
Manage the Corners: Rope lights have a minimum bend radius, usually around 2 to 4 inches. Never force a sharp 90-degree bend, as this can crimp the internal wires and cause a short circuit. Instead, create a soft loop or "U" shape at the corner.
Secure the Power Cord: Use a cord cover or "raceway" to hide the lead wire running from the ceiling down to the floor outlet. This provides a finished, professional look.
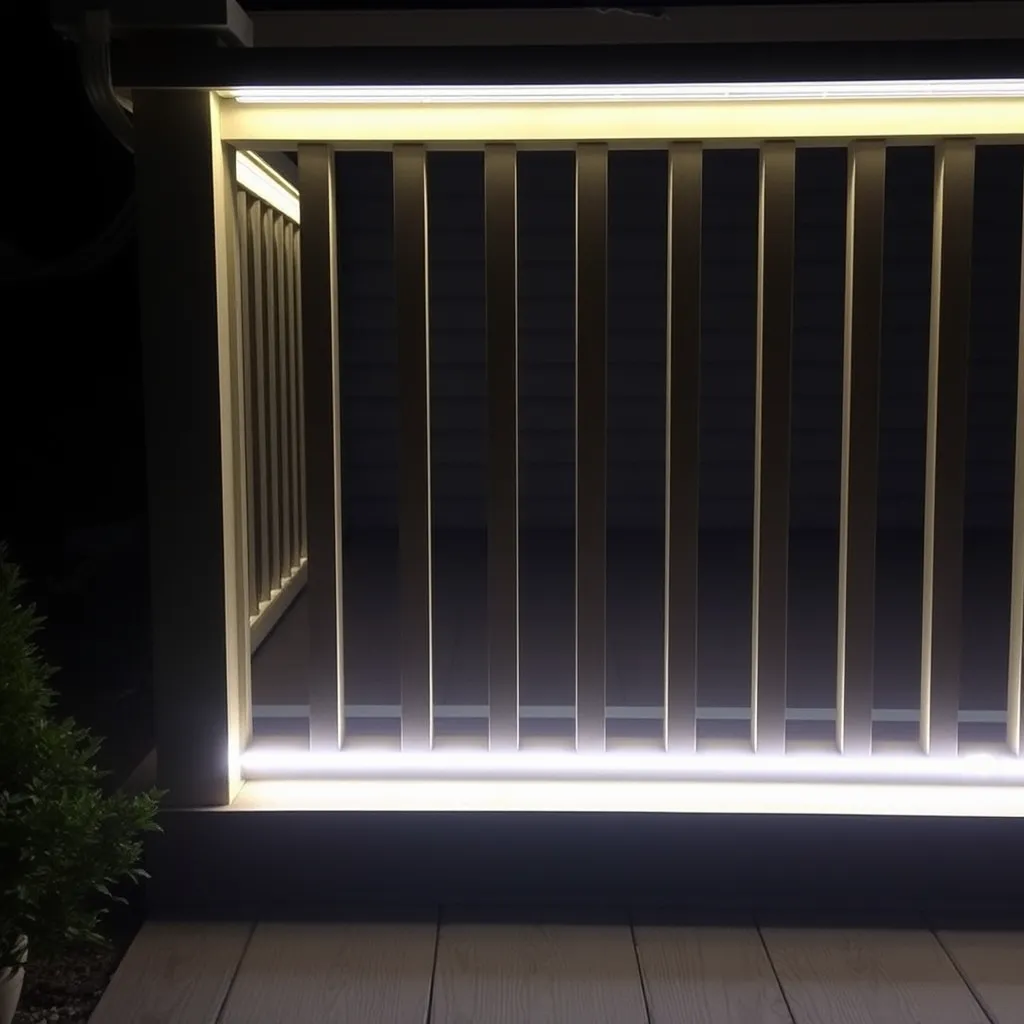
Outdoor Installation: Decks, Railings, and Rooflines
Outdoor environments introduce variables like wind, ice loading, and UV degradation. For these areas, mechanical fasteners (screws) are always superior to adhesives. If you must use cable ties, ensure they are black and specifically labeled as "UV-Stabilized" to prevent them from becoming brittle and snapping after a few months in the sun.
Deck Railing Techniques
To illuminate a deck without glare, mount the rope light to the underside of the top handrail. This directs the light downward onto the deck surface, improving safety while keeping the light source hidden from seated guests. Use clear P-clips and stainless steel screws to prevent rust streaks on the wood. Space clips every 10 inches to account for the natural expansion and contraction of the PVC tubing during temperature shifts.
Rooflines and Gutters
For seasonal holiday displays, gutter clips are the most efficient option. They slide onto the front lip of the gutter, holding the rope light securely without the need for permanent holes. For year-round architectural lighting along eaves, aluminum mounting tracks are the gold standard. These tracks are screwed into the fascia board, and the rope light snaps into the track. This ensures the line remains perfectly straight over long distances.
Technical Specifications and Cutting Rules
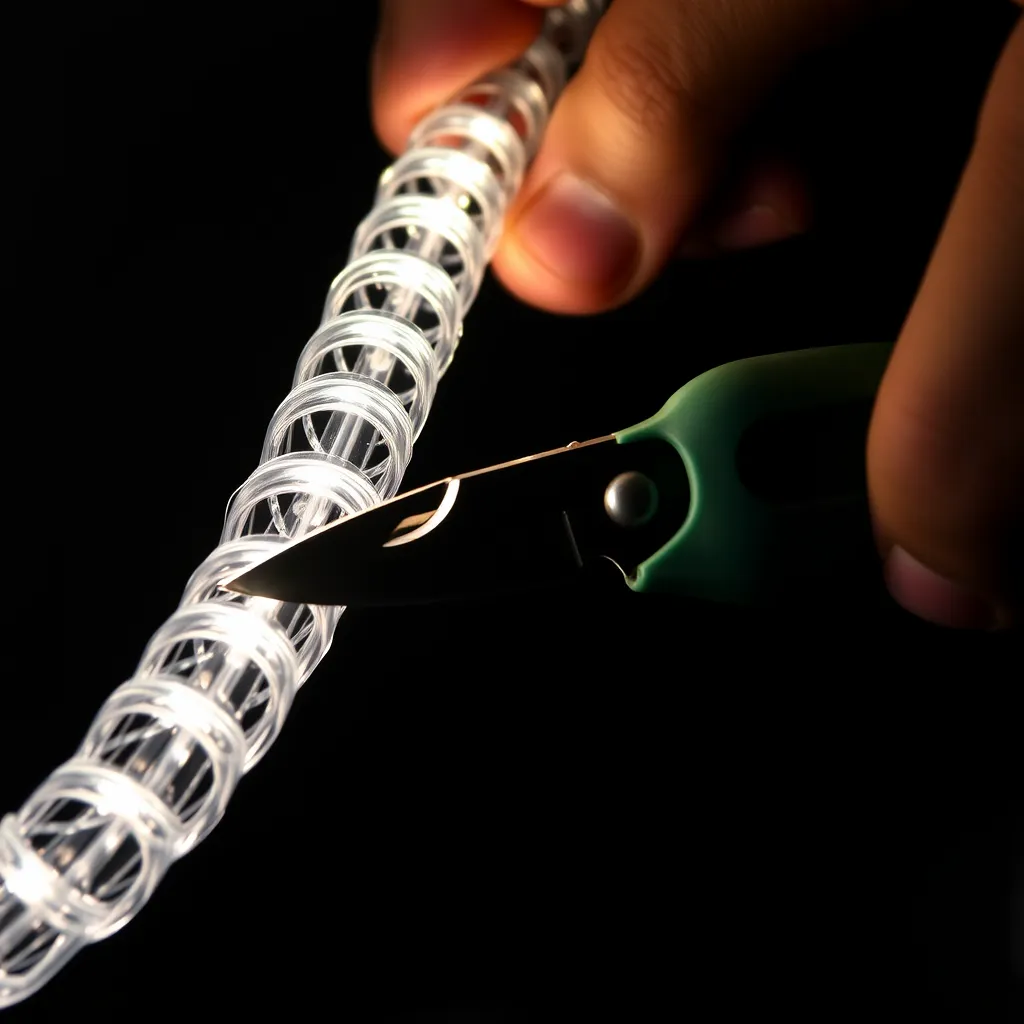
Unlike LED strips, which can often be cut every inch or two, rope lights have much longer "cut intervals." This is because the internal LEDs are wired in series-parallel circuits. Cutting anywhere other than the designated mark will kill the entire circuit section.
Specification | Standard Measurement |
|---|---|
Weight | 1.5 to 2 oz per foot |
Max Run (120V) | 150 feet |
Max Run (12V/24V) | 16 to 32 feet (before voltage drop) |
Cut Intervals | 18 to 36 inches (typical) |
Minimum Bend Radius | 2 to 4 inches |
Understanding Cut Marks
Look for a small scissors icon or a vertical dashed line printed on the PVC casing. Use a sharp pair of heavy-duty PVC cutters or a utility knife to make a clean, square cut. A jagged cut makes it difficult to achieve a watertight seal with connectors or end caps. If you are using 120V rope lights, the cut end is a significant shock hazard. Always apply a generous amount of clear silicone sealant inside the end cap before sliding it onto the cut end.
Maximum Run Lengths
Exceeding the maximum run length of a rope light will blow the fuse in the power cord or cause the internal wiring to overheat. Standard 120V LED rope lights typically support 150 feet. High-output versions may be limited to 100 feet. Always check the manufacturer's spec sheet before daisy-chaining multiple spools together.
Professional Finishing Touches
The difference between a DIY look and a professional installation often comes down to how the ends and corners are handled. If your rope light is slightly too long for the space, do not "double back" the light, as this creates a bright spot and can cause heat buildup. Instead, cut it to the nearest mark or hide the excess behind a decorative element.
For installations where the light must jump across a gap (like between two windows), use a "jump power connector." This is a length of non-illuminated wire with pins on both ends that plugs into the rope light sections. This allows you to maintain a single power source without having light where you don't want it.
Conclusion
Successfully hanging LED rope lights comes down to matching your mounting method to the surface and environment. Mechanical fasteners like screw-in P-clips and aluminum tracks outperform adhesives for permanent and outdoor installations, while Command hooks suit removable indoor setups. Always test and warm the rope beforehand to eliminate spool memory, space clips appropriately-typically every 12 inches-to prevent sagging, and respect minimum bend radii at corners. Outdoors, prioritize UV-stabilized hardware and seal all connections against moisture. Pay attention to cut marks, maximum run lengths, and proper end caps for safety. With careful planning and the right hardware, your installation will stay secure, straight, and professional for years.
Frequently Asked Questions
Q1: Why is my rope light sagging between the clips?
A: Sagging usually occurs because the clips are spaced too far apart or the rope light was installed while it was cold. For 1/2-inch rope lights, clips should be no more than 12 inches apart. To fix existing sag, wait for a warm day or use a hairdryer to soften the PVC, then pull the rope taut and add intermediate clips between the original ones.
Q2: Can I use staples to hang rope lights?
A: Never use a standard staple gun. The metal staple can easily pierce the PVC casing and hit the internal 120V wires, creating a fire hazard or a short circuit. If you prefer a staple-style look, use specialized insulated cable staples designed for coaxial or Romex cables, which have a plastic bridge to prevent the metal from touching the rope light.
Q3: How do I get the rope light to lay flat and straight?
A: Unspool the light and plug it in for 20 minutes before installation. The heat generated by the LEDs will soften the PVC. Once it is warm, stretch it out on a flat floor and let it cool in a straight line. This removes the "memory" of the spool, making it much easier to snap into mounting tracks or clips without it twisting or curling.
Q4: Are rope lights waterproof?
A: The PVC tubing itself is waterproof, but the connections and power plugs are often only "weather-resistant" (IP44 or IP65). For outdoor use, all connections-including the power cord joiner and the end cap-must be sealed with outdoor-rated clear silicone. If the plug is exposed to rain, it must be plugged into an "in-use" weatherproof outlet cover.