Mounting lighting systems to wooden surfaces presents a unique set of challenges compared to glass or metal. Wood is a dynamic, organic material that breathes, expands, and contracts with changes in humidity. Whether you are dealing with the polished mahogany of a custom bookshelf or the rough-hewn cedar of an outdoor pergola, the success of your installation depends entirely on how well the adhesive interacts with the wood's surface texture and chemical composition.
Most flexible light circuits come with a factory-applied adhesive backing, typically a thin acrylic-based pressure-sensitive adhesive (PSA). While these work flawlessly on non-porous surfaces, wood requires a more nuanced approach. To ensure a permanent bond that won't sag or peel over time, you must match your preparation technique to the specific type of wood finish you are working with.
Analyzing Your Wood Surface
Before reaching for the tape, identify the state of the wood. The porosity of the material dictates whether a standard adhesive will suffice or if mechanical fasteners are necessary. Wood surfaces generally fall into three categories:
Finished Wood: This includes surfaces that are painted, stained, or sealed with polyurethane, lacquer, or varnish. These are the easiest to work with because the sealant has filled the wood's pores, creating a smooth, plastic-like surface.
Raw or Unfinished Wood: This material is highly porous. When you apply adhesive to raw timber, the wood fibers can actually "wick" the oils out of the adhesive, or the tape may only contact the highest points of the grain, leading to a weak bond.
Engineered Wood (MDF/Plywood): Medium-density fiberboard (MDF) is often very dusty and porous unless laminated. Plywood can have voids or splinters that interfere with a flat mounting path.
Wood Type | Surface Energy | Recommended Mounting Method | Preparation Required |
|---|---|---|---|
Polyurethane Finish | High | Factory Adhesive or VHB Tape | Isopropyl Alcohol Clean |
Raw Pine/Oak | Low/Porous | Mechanical Clips or Aluminum Channels | Sanding and Sealing |
Painted MDF | Medium | Standard Adhesive | Tack Cloth Dusting |
Pressure-Treated | Variable | Stainless Steel Screws/Clips | Deep Cleaning & Drying |
Surface Preparation for Maximum Adhesion
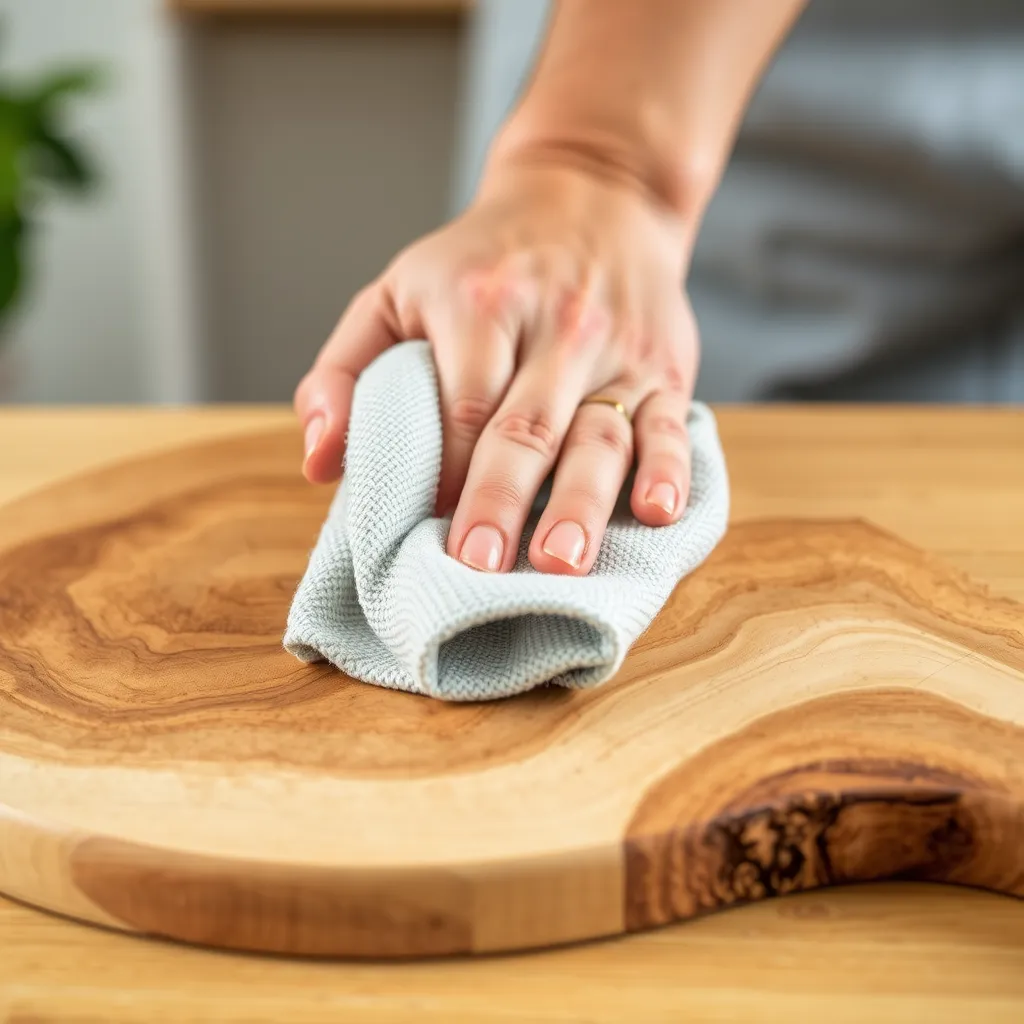
The primary reason light strips fail on wood is "invisible" debris. Even a surface that looks clean is often covered in microscopic dust, furniture wax, or oils from skin contact. For finished wood, the standard protocol involves cleaning the mounting path with 91% or higher isopropyl alcohol. Lower concentrations (like 70% rubbing alcohol) contain more water and oils, which can leave a residue that hinders bonding.
If the finish is exceptionally high-gloss or "slick," the adhesive may struggle to find a grip. In these cases, scuff-sanding is the most effective solution. Use 220-grit sandpaper to lightly abrade the specific path where the strip will sit. You aren't trying to remove the finish; you are simply creating "mechanical tooth"-microscopic scratches that allow the adhesive to bite into the surface. After sanding, always wipe the area again with alcohol to remove the fine dust.
For raw wood, the approach changes. Since raw wood is essentially a bundle of fibers, the adhesive is only sticking to the top layer of those fibers. If the fiber pulls away, the light falls. To prevent this, apply a thin layer of wood sealer or even a simple primer along the installation path. This seals the pores and creates a solid, non-porous "bridge" for the adhesive to grab onto.
Advanced Adhesion: Using 3M VHB Tape
The standard blue or white backing found on most budget light strips is often insufficient for long-term use on vertical or overhead wooden surfaces. If you want a "set it and forget it" installation, upgrading to 3M VHB (Very High Bond) tape is the professional choice. VHB tape is a closed-cell acrylic foam that is viscoelastic, meaning it acts like both a liquid and a solid.
When pressed onto wood, the foam flows into the microscopic irregularities of the grain, creating a much larger contact area than a standard flat tape. For wooden applications, 3M VHB 4910 (clear) or 4611 (dark grey) are the industry standards. To apply this, stick the VHB tape to the back of your lights first, then peel the liner and press the assembly onto the wood. Apply firm pressure-roughly 15 pounds per square inch-along the entire length. The bond reaches 50% strength after 20 minutes and 100% strength after 72 hours.
Mechanical Mounting Options
Adhesive is not always the right answer. In environments with high humidity (like bathrooms or kitchens) or temperature fluctuations (like outdoor decks), even the best tape will eventually fail as the wood expands and contracts. Mechanical fasteners provide a physical guarantee that the lights will stay put.
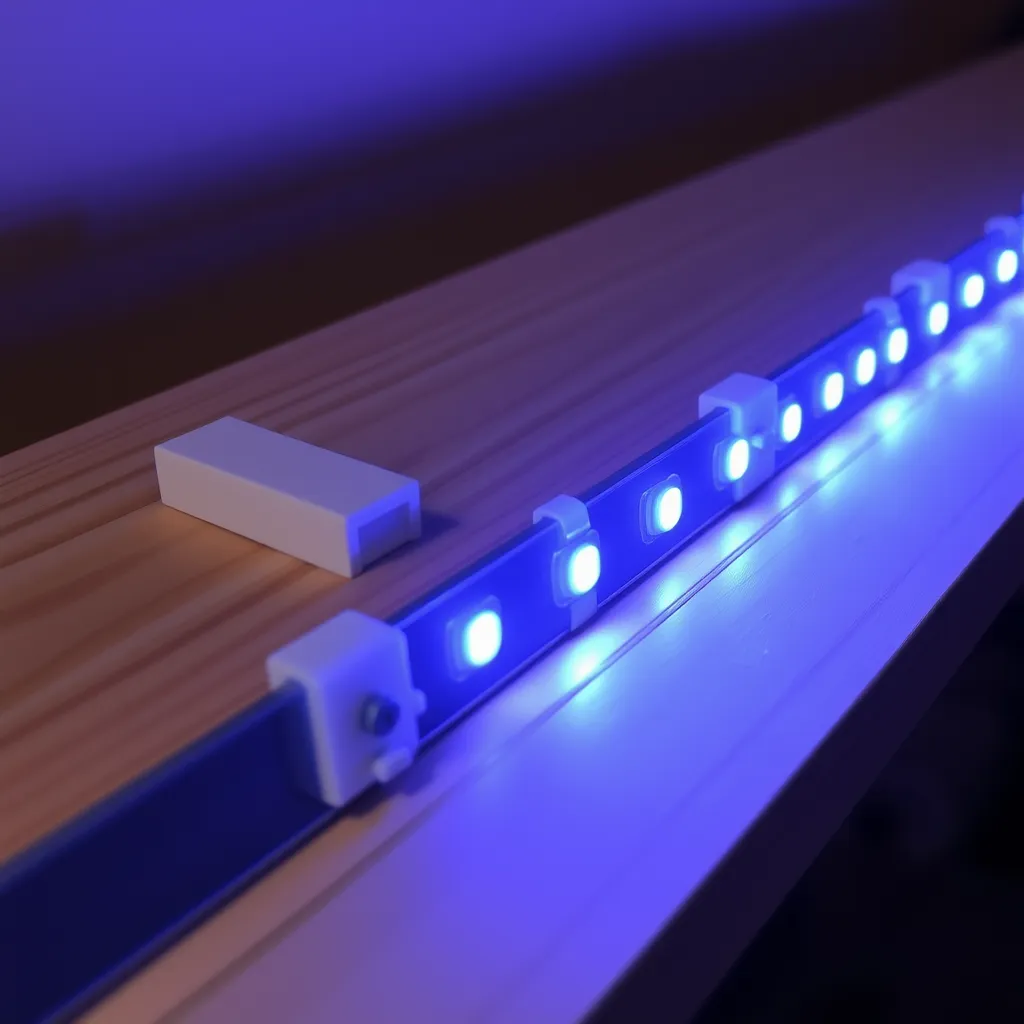
Mounting Clips and Brackets
Small silicone or plastic mounting clips are the most common mechanical solution. These are typically "U-shaped" and bridge over the strip, secured by a tiny screw on one or both sides. These should be placed every 12 inches on horizontal runs and every 6 inches on vertical or overhead runs. The benefit of clips is that they allow the wood to move independently of the light strip without putting stress on the circuit board.
Stapling Safety
While a staple gun is fast, it is risky. If a staple pierces the copper traces or the protective coating of the strip, it can cause a short circuit, lead to "dead" sections, or even create a fire hazard. If you must use staples, use a specialized cable tacker with insulated crowns or "U-shaped" staples that are wider than the strip itself. Never drive a staple directly through the center of the tape.
Professional Aluminum Channels
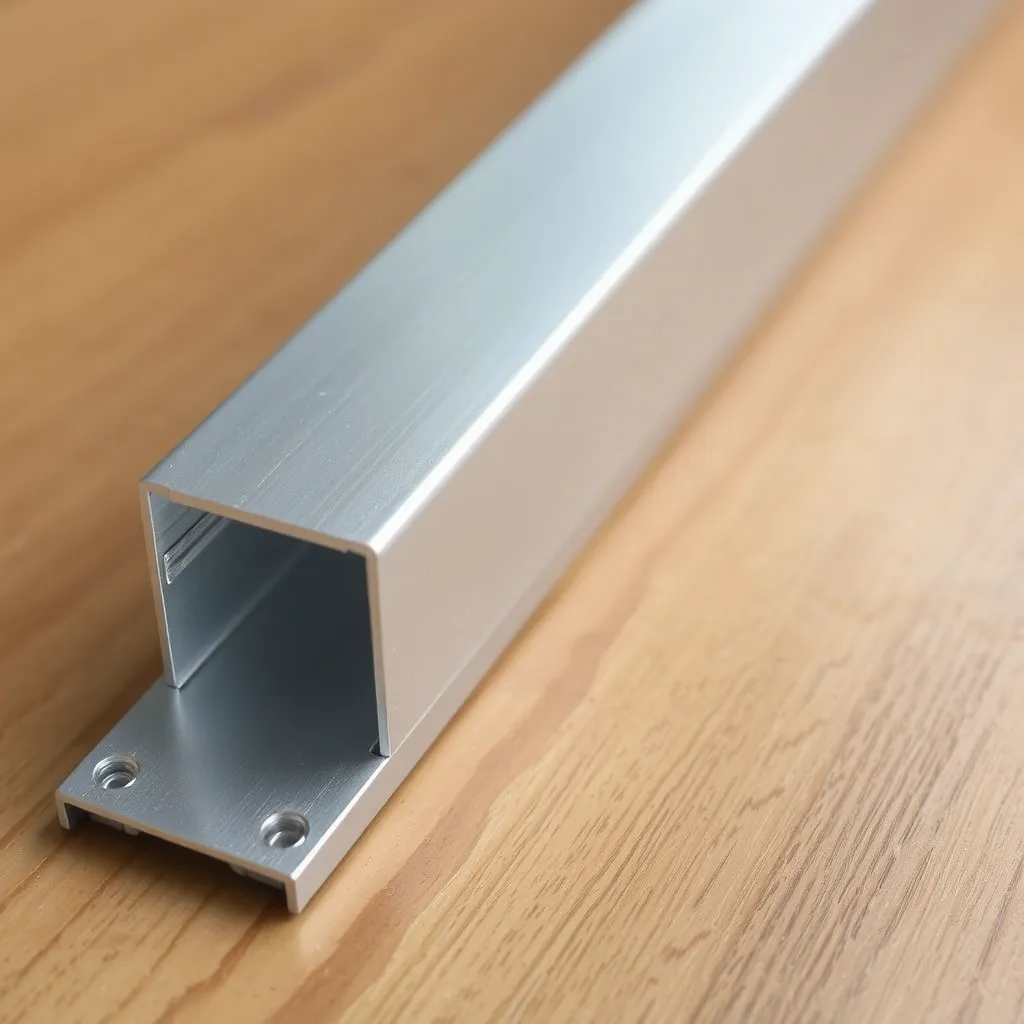
For the highest quality result, aluminum channels (also called profiles or extrusions) are the gold standard when working with wood. This method involves screwing a slim aluminum track directly into the wood and then adhering the light strip inside that track. This approach offers three major advantages:
Thermal Management: Wood is an excellent insulator, which means it traps heat. LED chips that get too hot will dim prematurely or shift in color. The aluminum acts as a heat sink, drawing thermal energy away from the LEDs and dissipating it into the air.
Light Diffusion: Most channels come with a frosted or milky "diffuser" cover. This blends the individual "dots" of light into a solid, continuous glow, which looks much more refined against the natural grain of the wood.
Physical Protection: In high-traffic areas like under-cabinets or stair treads, the channel protects the delicate circuit from dust, moisture, and accidental impact.
When installing channels on wood, always pre-drill your pilot holes. Wood, especially hardwoods like oak or maple, is prone to splitting when small screws are driven near the edges. Use a drill bit slightly smaller than the screw's diameter to ensure a clean, secure fit.
Heat Management and Safety on Wood
A common concern is whether these lights pose a fire risk when attached to a combustible material like wood. Standard 12V or 24V LED strips are generally safe. Most operate at temperatures between 100°F and 120°F (38°C to 49°C). For context, the ignition temperature of most softwoods is well above 400°F (200°C).
However, high-output strips (those exceeding 15 watts per meter) can get significantly hotter. If you are mounting high-power "workhorse" strips directly to raw wood without a channel, ensure there is some airflow. Do not "bury" the strip in a tight groove and then seal it with caulk or resin, as this creates a heat trap. Always use a Class 2 power supply, which is designed to shut down if a short circuit occurs, providing an extra layer of safety for your wooden structures.
Installation Checklist for Success
Measure twice: Cut the strip only at the designated cut marks (usually marked by copper pads).
Solder or Connect: Attach your lead wires or connectors before sticking the strip to the wood. Applying pressure to a connector once the strip is already stuck can pull the adhesive off the surface.
Test before sticking: Power on the entire run to check for color consistency and dead LEDs before you commit to the adhesive bond.
Avoid Tension: Never pull the strip taut. If the strip is under tension, the ends will eventually "shrink" and peel away from the wood. Lay it down loosely and press it in place.
Conclusion:
Achieving a permanent bond on wood requires a shift from a 'peel and stick' mindset to a 'prepare and mount' strategy. Because wood is a natural material that reacts to its environment, the success of your lighting project depends on the initial work done before the lights are even powered on. By matching your adhesive choice to the specific finish of the wood and allowing for proper curing time, you can prevent the sagging and peeling that plagues many DIY installations.
For long-term reliability, especially in high-traffic areas or environments with fluctuating humidity, consider the integration of mechanical fasteners or aluminum channels. These not only provide a more secure physical connection but also aid in heat dissipation, which preserves the life of the LEDs and the integrity of the wood itself. A thoughtful installation today ensures your custom woodwork remains beautifully illuminated for years to come.
Frequently Asked Questions
Q1: What if I want to remove the lights later without damaging the wood?
A: To protect a delicate wood finish, apply a layer of high-quality painter's tape to the wood first, then stick the LED strip to the back of the tape. When you are ready to remove the lights, the painter's tape will peel off cleanly without lifting the varnish or paint. If the adhesive is already stuck to the wood, use a hair dryer to soften the glue before gently prying it up with a plastic putty knife.
Q2: Can I use hot glue to secure LED strips to wood?
A: Hot glue is generally not recommended for long-term installations. The heat from the LEDs can soften the glue over time, causing the strip to fall. Additionally, hot glue does not bond well to finished or oily woods. Use a silicone-based adhesive or 3M VHB tape for a more reliable, heat-resistant bond.
Q3: How do I handle corners on a wooden frame?
A: Do not bend the LED strip at a sharp 90-degree angle; this can crack the internal copper traces. Instead, use a "ribbon" fold (creating a small loop) or use a gapless clip-on connector. For a professional look on wooden furniture, it is best to cut the strip and use short jumper wires to navigate the corner, allowing the strips to lay perfectly flat on each side.