To install LED strip lights on stairs, clean each step, measure and cut the strip at its marked cut points, then peel and stick it under the front lip (nosing) of each tread or along the side wall. Connect the segments with clip connectors or short wire jumpers, then plug into the power supply. For hands-free safety, add a motion sensor so the lights turn on automatically in the dark. The whole job takes about 1-2 hours and needs no electrician for standard low-voltage (12V/24V) strips.
Done right, stair strip lights add both safety and a high-end look. This guide walks through every step - placement, cutting, sticking, wiring the steps together, powering the run, and adding a motion sensor - plus how to hide the wires for a clean finish.
What You'll Need:
Tools | Materials |
|---|---|
Scissors (for cut points) | LED strip light (warm white 3000K recommended) |
Tape measure | Power supply (correctly sized - see Step 6) |
Isopropyl (rubbing) alcohol + cloth | Clip connectors or wire + solder (to join steps) |
Optional: soldering iron | Optional: aluminum channel + diffuser |
Optional: drill (to route wires) | Optional: PIR motion sensor / stair controller |
Step 1: Plan the Layout and Placement:
Decide where the light will sit. The three common placements:
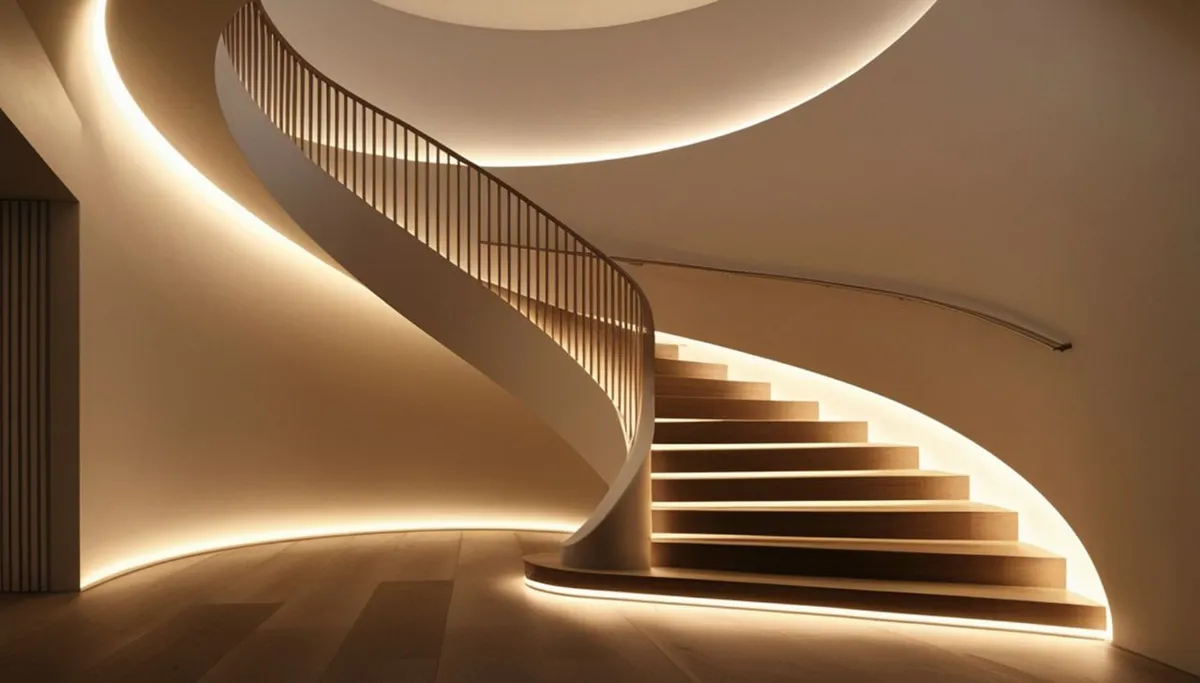
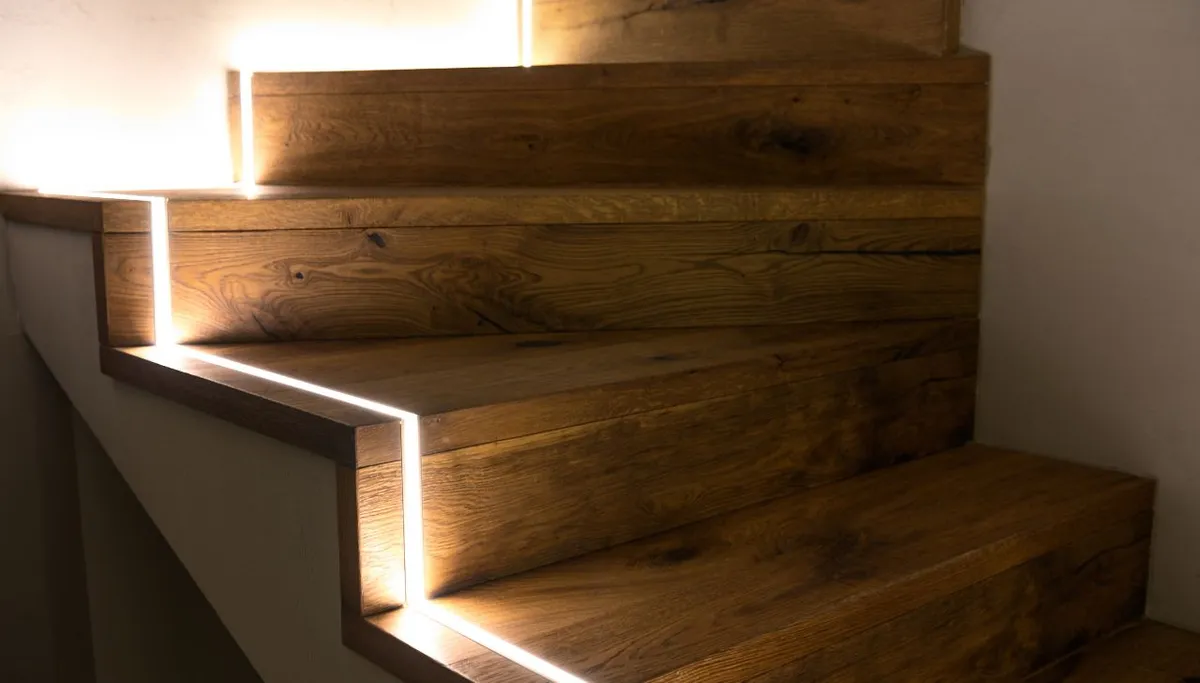
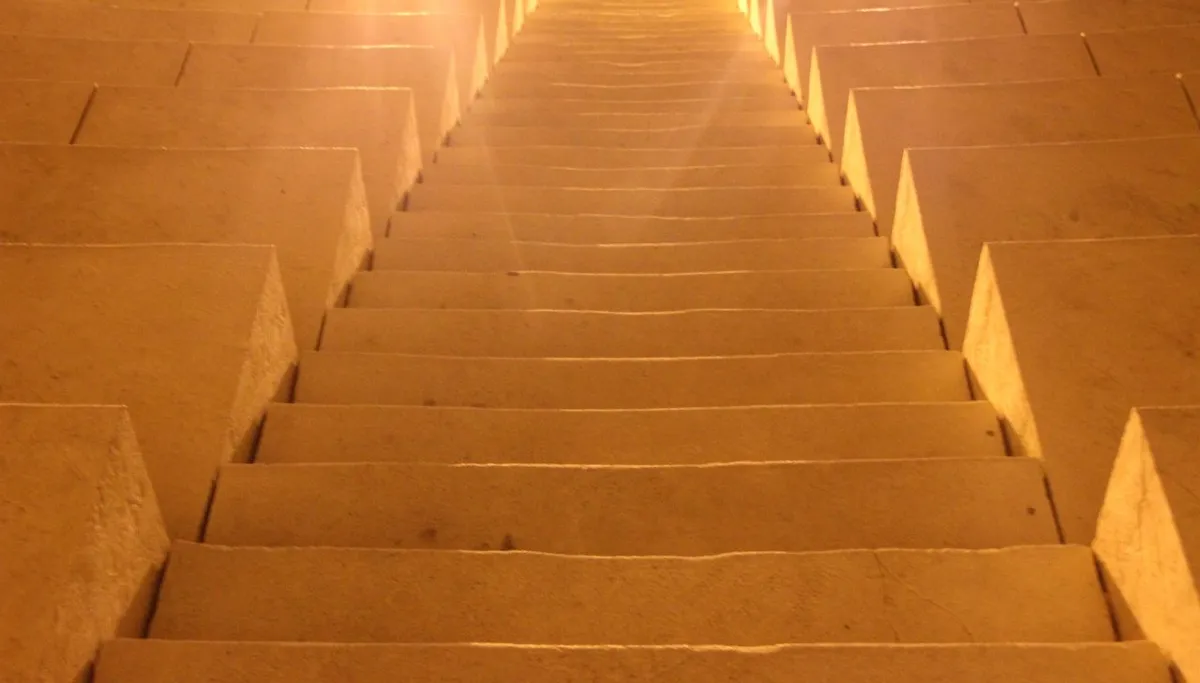
Under the nosing (best): Stick the strip under the front lip of each tread so it lights the step below. The strip stays hidden and there is no glare in your eyes - the cleanest, most popular look.
Along the side wall or skirting: Run one continuous strip up the wall beside the stairs. Easiest to wire (no per-step joins) and great for a modern accent.
On the stringer or under a handrail: Good for open-sided staircases.
Then choose your approach: one continuous strip up the side (simplest), or individual segments cut for each tread and joined by wires (the per-step look). Measure your total run or the width of each tread now - a standard tread is about 36 inches wide.
Color tip: Choose warm white (2700K-3000K) for stairs - it is inviting and easy on the eyes at night. A dimmable strip lets you keep it low after dark.
Step 2: Measure and Cut the Strip:
LED strips can only be cut at the marked cut lines - look for the scissor icon and copper pads spaced every 1-4 inches. Cutting anywhere else breaks that section.
Measure each tread (or your full run) and note the length.
Find the nearest cut line at or just under that length.
Cut straight across the copper pads with scissors.
If your strip is RGB or RGBIC, keep track of the copper pad labels (+, R, G, B) - you will match them when you connect segments.
Step 3: Clean and Prep the Surface:
This is the step most people rush - and it is why strips fall off. The adhesive only holds on a clean, dry, smooth surface.
Wipe each mounting spot with isopropyl alcohol to remove dust, grease, and residue.
Let it dry completely (a minute or two).
On rough, textured, or freshly painted surfaces, plan to use mounting clips or an aluminum channel - adhesive alone will not last there.
Step 4: Stick the Strips:
Peel back a few inches of the adhesive backing (don't remove it all at once).
Line the strip up, then press it down firmly as you peel the rest, working along the step.
Hold each section for about 20-30 seconds to bond the adhesive.
For a premium, dotless finish and far better durability under foot traffic, mount the strip inside an aluminum channel with a diffuser cover. The diffuser blends the individual LEDs into a smooth line of light and protects the strip.
Step 5: Connect the Steps Together:
If you cut separate segments for each tread, you now join them - carrying power from one step down the riser to the next.
Clip (solderless) connectors: The fast, no-tools option. Snap the strip end and a lead wire into the connector, matching polarity (+ to +, - to -). Gap and corner connectors handle the turn down each riser.
Wire jumpers (soldered): The most durable option. Solder a short length of wire between the copper pads of one segment and the next. Use 2 wires for single-color strips (4 for RGB, 5 for RGBW).
Keep jumper wires as short as practical, and always match voltage, strip type, and polarity across every join.
For the full connector and soldering walkthrough, see our guide on how to connect LED strip lights.
Step 6: Power the Run (Size It Right):
Connect the strip to its power supply and plug in. Two rules keep it bright and safe:
Size the power supply to at least 120% of the strip's total wattage (watts per meter × total meters). An undersized supply overheats and fails early.
Respect the run length. A 12V strip should not run more than about 5 meters (16 ft) in one chain before the far end dims (voltage drop). For a long staircase, use a 24V strip, feed power to both ends, or run segments in parallel back to the supply.
Seeing dim steps at the top? That is voltage drop. Switch to 24V, inject power at both ends, or shorten the run.
Step 7: Add a Motion Sensor (Optional but Recommended):
For automatic safety lighting, wire a PIR motion sensor inline between the power supply and the strip so the lights switch on as you approach and off after you leave.
Place sensors at the top and bottom of the stairs so motion is caught from either direction.
Choose a sensor with a daylight (dusk-to-dawn) function so it only triggers in the dark, saving energy.
For the cascading effect (each step lighting up in sequence), you need a dedicated stair-light controller with multiple channels and two motion sensors - the steps then illuminate one by one as you climb.
How to Hide the Wiring:
Clean wiring is what separates a DIY look from a professional one:
Tuck the strip and wires under the tread nosing so they are invisible from normal viewing angles.
Run connecting wires down the side of the riser, along the stringer, or behind the skirting board.
On carpeted stairs, route wires under the carpet edge.
Use small cable clips to keep runs tidy, and drill a discreet hole to pass wires to a hidden power supply or controller (many people tuck the controller in a closet under the stairs).
Common Mistakes to Avoid:
Skipping the alcohol wipe - the number one reason strips peel off later.
Cutting between the marked points - this kills that section of strip.
Exceeding the run length - causes dim, uneven light at the far end.
Undersizing the power supply - leads to overheating and early failure.
Mounting where the strip shines in your eyes - always aim light down onto the tread, ideally under the nosing.
Skipping a diffuser - leaves a dotty look instead of a smooth line.
Not sure which strip or kit to buy first? See our picks for the best LED lights for stairs and the best LED strip lights, and for app control, how to connect LED lights to your phone.
(FAQs):
Q1. Where should LED strip lights go on stairs?
A: The best spot is under the front nosing of each tread, so the strip stays hidden and lights the step below without glare. Along the side wall or skirting is the easiest alternative and needs no per-step wiring.
Q2. Can you cut LED strip lights to fit each step?
A: Yes, but only at the marked cut lines (the scissor icon between copper pads). Cutting anywhere else breaks that section. Measure each tread first, then cut at the nearest cut point.
Q3. How do you connect LED strips between steps?
A: Join segments with solderless clip connectors (fast, no tools) or soldered wire jumpers (most durable). Match polarity and strip type at every join, and keep the jumper wires short.
Q4. Do stair LED lights need a motion sensor?
A: It is optional but recommended for safety. A PIR sensor turns the lights on automatically as you approach. Place one at the top and bottom, and pick one with a daylight sensor so it only runs in the dark.